
When Thomas Young first did the Double-Slit Experiment in 1803, he proved that light travels in a wave. He showed this by aiming a narrow beam of light at a barrier with one or two slits and placing a screen behind it. When the light went through one slit, it hit the screen in a single blob. But when it went through two slits, the light on the screen spread out into many stripes of dark and light -- which is what you would see if two waves were overlapping to create an interference pattern.
When Quantum Physics was introduced, the experiment was done with a stream of photons passing through the slits one photon at a time. Amazingly, over time the individual photons also created an interference pattern on a screen on the other side -- meaning that each single photon was interfering with itself as it passes through both slits at the same time!
The Quantum Eraser experiment just makes this weird result even weirder. First polarizing lenses with different orientations are put in place so that you can tell whether the light went left or right through the slits. "Labeling" the photons in this way makes the light go back to acting like particles -- the interference pattern is erased. And if you add still another polarizing filter, so that you can't tell which way the particles went, the pattern reappears!
When I read in Orzel's book that the May 2007 issue of Scientific American had a Quantum Eraser experiment you could do at home, I knew I had to try it! After a bit of searching, I was able to find the article online. (Actually, what I found is everything but the article, but the sidebars and other content include everything you need to do the experiment.) Like a lot of demonstrations that we try, it was a little hard to tell what, if anything, was happening, and I'm not sure it was completely successful. However, the results we did get were good enough to be worth sharing here. The article includes some trouble-shooting tips that may produce better outcomes if we ever try it again.
The experiment consists of four parts:
- Create a double-slit set-up using a cheap laser pointer as a light source.
- Add a right/left polarizing filter.
- Hold up a polarizing filter on a diagonal, which allows some "left" and some "right" particles to pass through.
- Make a polarizing lens which filters light on one diagonal on the top and the other on the bottom and add that to the set-up.
Materials:
- laser pointer pen (from the supermarket)
- polarized film (we used the lenses from cardboard 3D movie glasses)
- thick rubber band
- white foam-core board (for projection screen)
- Styrofoam cups
- unused twist ties
- tape

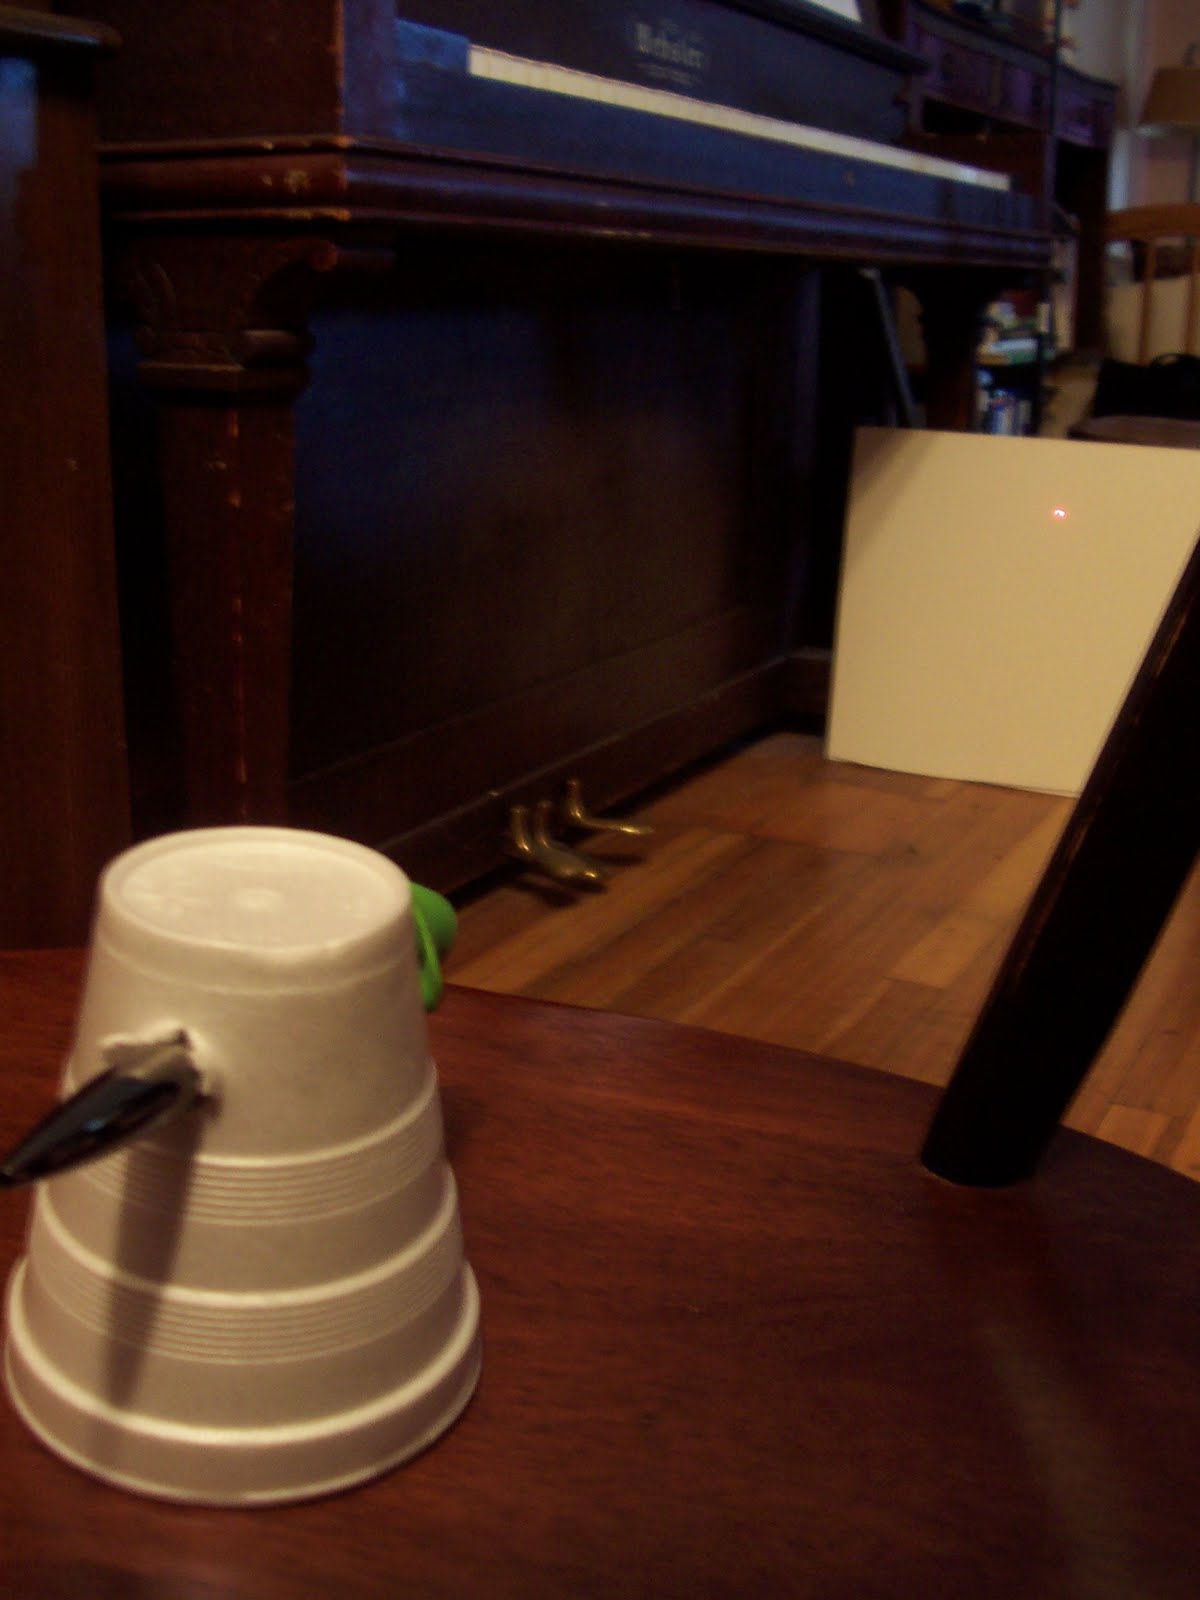


- First we made a stand for the laser pointer pen by pushing it through an upside-down Styrofoam cup.
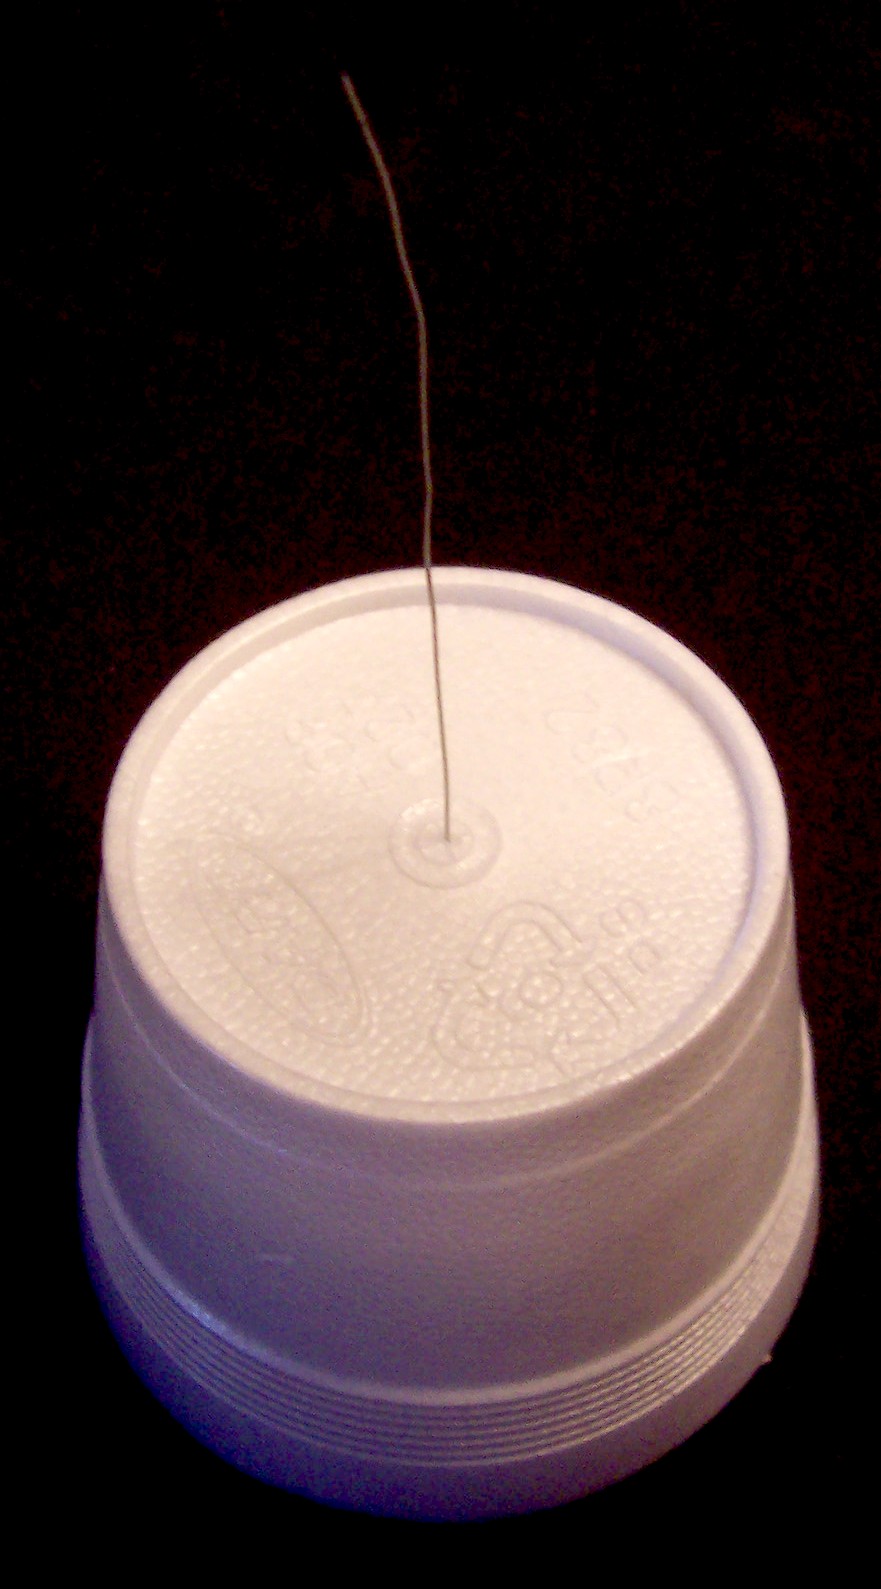
- Instead of a barrier with a slit, this version uses a vertical piece of wire to divide the light into "right" and "left." We cut the paper off of a twist tie and removed the wire without bending it. Then we made a stand for the wire by cutting around the top of a foam cup to make it shorter than the laser stand. We turned the cup upside down and poked the wire through the bottom so that it was standing straight up.
- We wrapped a rubber band around the laser's ON button so that it would stay on.
- The laser was put in its holder and placed on the seat of a chair. The foamcore projection screen was set up by leaning it against a chair about 6 feet away. We could see a small dot of laser light on the screen. (See directly above.)
- Then the wire in its holder was set up a few inches away from the laser. We moved it until it was in the path of the laser light. An interference pattern appeared! (Photo at top of post.)
- To make the labeler, we took the polarized glasses, and marked the lenses "right" and "left." Then we cut them out, leaving the cardboard frame around everywhere but the inside edge (towards the nose piece). The two lenses were taped together so that the inside edges were just touching (no overlap or gap). Another twist-tie wire was taped along the join and trimmed.
- A holder was made by cutting off the top of another foam cup, then slicing a slot across the bottom. The labeler was set into the slot so that the wire was vertical in the center.
- The labeler was put in place of the plain wire. The light hitting the screen returned to blob form.
- Taking another pair of polarized lenses, we held up the "left" and "right" lens at a 45 degree angle between the labeler and the screen. At this point the light projected on the screen was hard to make out, but it did seem to spread out again like an interference pattern.
- Finally, we took a left and right lens, cut them on a diagonal, and taped them together so that one was on top and one on the bottom. According to the SciAm directions, we should have seen an interference pattern split so that the top was off to one side and the bottom to the other, like misaligned teeth. All we could see was misaligned blobs, though. (See below.)

In my opinion, we achieved some interesting effects, for a living-room physics lab.
![Reblog this post [with Zemanta]](http://img.zemanta.com/reblog_e.png?x-id=e058b7df-6c56-4c08-b389-b62369cb2072)


![Reblog this post [with Zemanta]](http://img.zemanta.com/reblog_e.png?x-id=af0d3a87-fd0a-45c2-88f2-fdafe5444317)

