Showing posts with label Labs. Show all posts

Wednesday, October 31, 2012

My New Book -- Science, Technology and Geeky Fun!

This past year has been busy -- but the result has been a new book with amazing science and geeky projects for kids and families!


Robotics: Discover the Science and Technology of the Future with 20 Projects, a book for kids ages 9-12 from Nomad Press, is packed full of information about how robots work and contains "low tech/no tech" projects based on actual robotics research. No special tools or skills are needed to build any of the working robotics models in this book -- just ordinary crafts materials and recycled electronics parts!

Robotics is available from Amazon or can be ordered by your favorite local bookstore. See sample projects and photos and read more about the books on my website Crafts for Learning  and my Amazing Robotics Projects Facebook page!

Thursday, June 10, 2010

Particle Cloud Chamber


This week, we made a cloud chamber to see radioactive particles just using dry ice. It was surprisingly easy to do, and anyone can make it. The only hassle was getting a few of the materials, and we had a couple setbacks, but when we got it working it was definitely worth it.
The set-up


All you need is:

  • A sturdy clear container (glass or plastic) which won't crack at low temperatures. We used a small Pyrex glass dish with a plastic lid from Wal-Mart.
  • A sheet of black sticky-back felt.
  • A sheet of black construction paper.
  • Isopropyl alcohol. The kind we used was 91% isopropyl alcohol, which is available in most drugstores or supermarkets. Be sure to use this in a well-ventilated space, because the fumes are poisonous and flammable. Try to avoid getting it on your skin as much as possible.
  • A Styrofoam container, like a picnic cooler. You want a container with a lid that's loose, because pressure will build up inside.
  • Winter or heavy work gloves and/or tongs.
  • Dry ice. Except around Halloween, this might be hard to find. We had to go to a welding supply store an hour from our house. It came in a 10-pound chunk, but we only used half of it. We asked them to cut it in half, so we had a flat slab. (We played around with the rest.) Bring the cooler when you go buy it. Be VERY careful with it -- dry ice has a temperature of -109 degrees Fahrenheit! Use gloves or tongs when handling it.
  • A heat source. We used a wet washcloth, folded into a square and wrapped with plastic wrap, then heated in the microwave. 
  • A bright flashlight, like an LED light.

    You'll also nee a radioactive source. We got some uranium marbles from United Nuclear which worked pretty well. For $10 you get 3 marbles and a piece of uranium ore. Keep your uranium in a plastic bag away from food, children or pets. Wash your hands after handling.
A quick side-experiment we did was light up the marbles with a blacklight, which came out really cool:


Assembly

We put a few different variations of the cloud chamber together, but we only got one to work. Our working version is detailed below, but we also have some links that have some more versions of how to make the chamber at the bottom of the post.

What we did was cut out a circle of the sticky-back felt, and attach it to the inside of the lid. We then cut a strip of construction paper and put it around the outside of the container to block out light. We left a little “window” to look in and a smaller window in the back to shine the light through.

To use the cloud chamber, we first soaked the felt with the alcohol. We did this outside. The next part was to simply place the uranium marble into the container. To hold the slab of dry ice, we set it in the lid of the Styrofoam cooler (on top of a metal tray). We put the container on top of the dry ice slab, and then put the heated washcloth on top. Last, we placed the flashlight so it shined in the back window and waited for clouds of alcohol vapor to form. This took a few minutes.
When the vapor forms, you'll see what looks like slowly-falling rain inside. Particles being emitted by the marble formed lines in the fog. If you look closely at the two photos below (click on them to enlarge), you can see the particles shooting off from the marble. Look about half an inch below the marble in the second shot and you'll see a white line heading off toward the left. That's the ionization trail.


Afterwards we decided that the experiment would have worked better if we had used a glass petri dish with a clear top, because it was hard to see through the little window.

How it works

So how do dry ice and marbles create visible particles? When the chamber is cooling down, the air can't hold the warm alcohol vapor. When this happens, the alcohol starts forming into small clouds. At the same time, the radiation source, the marble in this case, is decaying and releasing charged particles throughout the container. These particles leave a trail of ions which shoot through the vapor clouds, and make visible trails in the fog.

According to Theodore Gray's website, www.periodictable.com, the emissions from the uranium marbles are alpha particles. Other sources of radiation may also give you beta and gamma particles. (Here's a student-made explanation of the different types of radioactive decay.)

You might have to experiment with different types of chambers to get a good result. We combined two different versions, both of which work well. You can see them on YouTube. The first, from Jefferson Lab, uses a petri dish and a needle impregnated with Lead-210 as a radiation source. The second video is from Scottish student Holly Batchelor, who won the Intel International Science and Engineering Fair's First Award for physics and astronomy. She built her cloud chamber out of a plastic aquarium, and used naturally-occuring cosmic rays as her radiation source. A more complicated version by Andy Foland has diagrams explaining what you might see.

Monday, April 12, 2010

Tape Emissions


In 2008, scientists found that they could generate enough X-ray radiation to take an image of a researchers finger simply by unrolling a roll of adhesive tape. As the video above shows, the trick is to unroll the tape in a vacuum. According to Scientific American:
The reason, says Camara: electrons (negatively charged atomic particles) leap from a surface (peeling off of glass or aluminum works, too) to the adhesive side of a freshly yanked strip of tape, traveling so fast that they give off radiation, or energy, when they slam into it.
In a regular atmosphere, the electrons still give off radiation, but because the air molecules slow them down, they appear in the visible spectrum.

We tested this in a dark room (so dark that you can't see) using both adhesive tape and duct tape. Peeling the tape off quickly gave off a bright blue flash, but peeling it slowly produced a steady blue line where the tape was unrolling from the roll. With adhesive tape, at least, we could create the effect again and again with the same piece of tape. It's called called triboluminescence-- the same process that creates sparks when you bite into Wintergreen Life Savers.

Our little camera wasn't sensitive enough to pick up the blue flash, but here's a YouTube video made by someone with better equipment:


Reblog this post [with Zemanta]

Thursday, March 25, 2010

The Famous Double-Slit Experiment and the DIY Quantum Eraser

In How to Teach Physics to Your Dog, author and Union College Physics Professor Chad Orzel talks about an extension of the Double-Slit Experiment called the Quantum Eraser. According to Orzel -- and before him to physicist and wise guy Richard Feynman -- everything the average person needs to know about Quantum Physics is contained in the Double-Slit Experiment.

When Thomas Young first did the Double-Slit Experiment in 1803, he proved that light travels in a wave. He showed this by aiming a narrow beam of light at a barrier with one or two slits and placing a screen behind it. When the light went through one slit, it hit the screen in a single blob. But when it went through two slits, the light on the screen spread out into many stripes of dark and light -- which is what you would see if two waves were overlapping to create an interference pattern.

When Quantum Physics was introduced, the experiment was done with a stream of photons passing through the slits one photon at a time. Amazingly, over time the individual photons also created an interference pattern on a screen on the other side -- meaning that each single photon was interfering with itself as it passes through both slits at the same time!

The Quantum Eraser experiment just makes this weird result even weirder. First polarizing lenses with different orientations are put in place so that you can tell whether the light went left or right through the slits. "Labeling" the photons in this way makes the light go back to acting like particles -- the interference pattern is erased. And if you add still another polarizing filter, so that you can't tell which way the particles went, the pattern reappears!

When I read in Orzel's book that the May 2007 issue of Scientific American had a Quantum Eraser experiment you could do at home, I knew I had to try it! After a bit of searching, I was able to find the article online. (Actually, what I found is everything but the article, but the sidebars and other content include everything you need to do the experiment.) Like a lot of demonstrations that we try, it was a little hard to tell what, if anything, was happening, and I'm not sure it was completely successful. However, the results we did get were good enough to be worth sharing here. The article includes some trouble-shooting tips that may produce better outcomes if we ever try it again.

The experiment consists of four parts:
  1. Create a double-slit set-up using a cheap laser pointer as a light source.
  2. Add a right/left polarizing filter.
  3. Hold up a polarizing filter on a diagonal, which allows some "left" and some "right" particles to pass through.
  4. Make a polarizing lens which filters light on one diagonal on the top and the other on the bottom and add that to the set-up.
Obviously, since we were using a cheap laser pointer and weren't sending light through one photon at a time, this experiment doesn't prove that a single particle will go both ways at once, but it does give you a good approximation of what happens on a quantum level. Below is a description of what we did:

Materials:
  • laser pointer pen (from the supermarket)
  • polarized film (we used the lenses from cardboard 3D movie glasses)
  • thick rubber band
  • white foam-core board (for projection screen)
  • Styrofoam cups
  • unused twist ties
  • tape

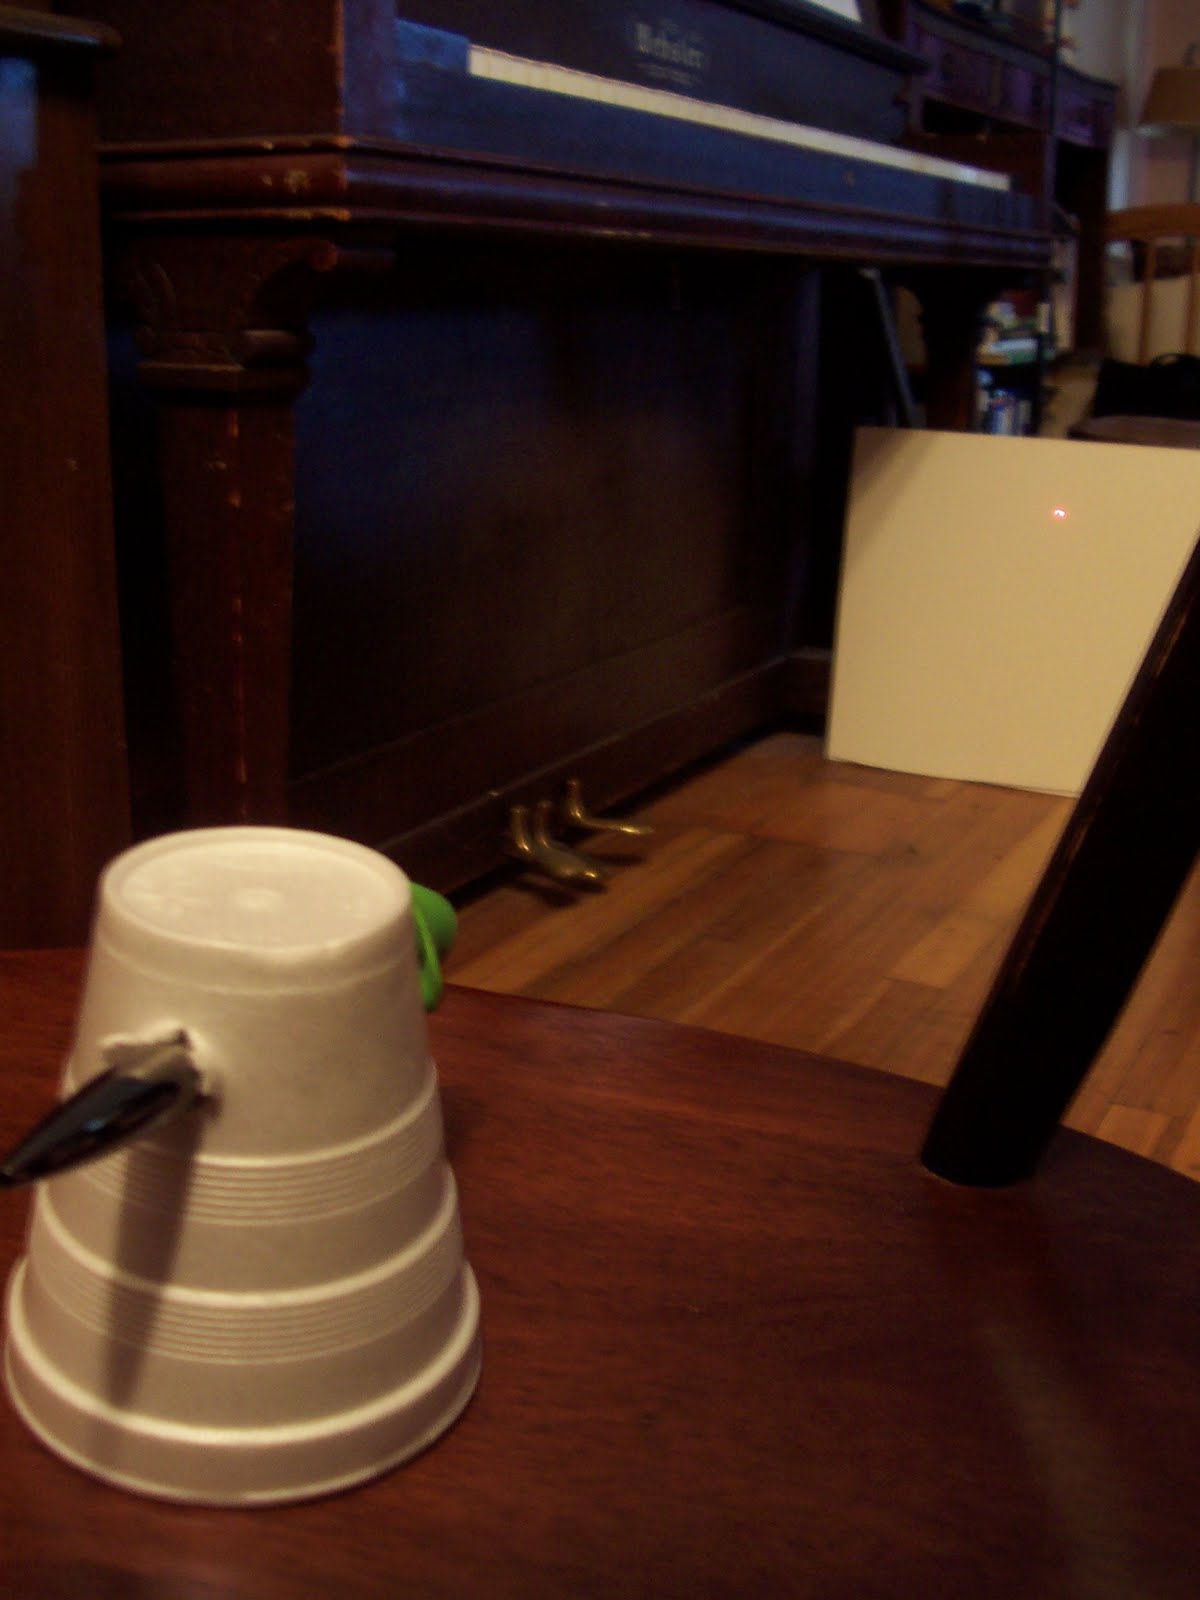
  1. First we made a stand for the laser pointer pen by pushing it through an upside-down Styrofoam cup.
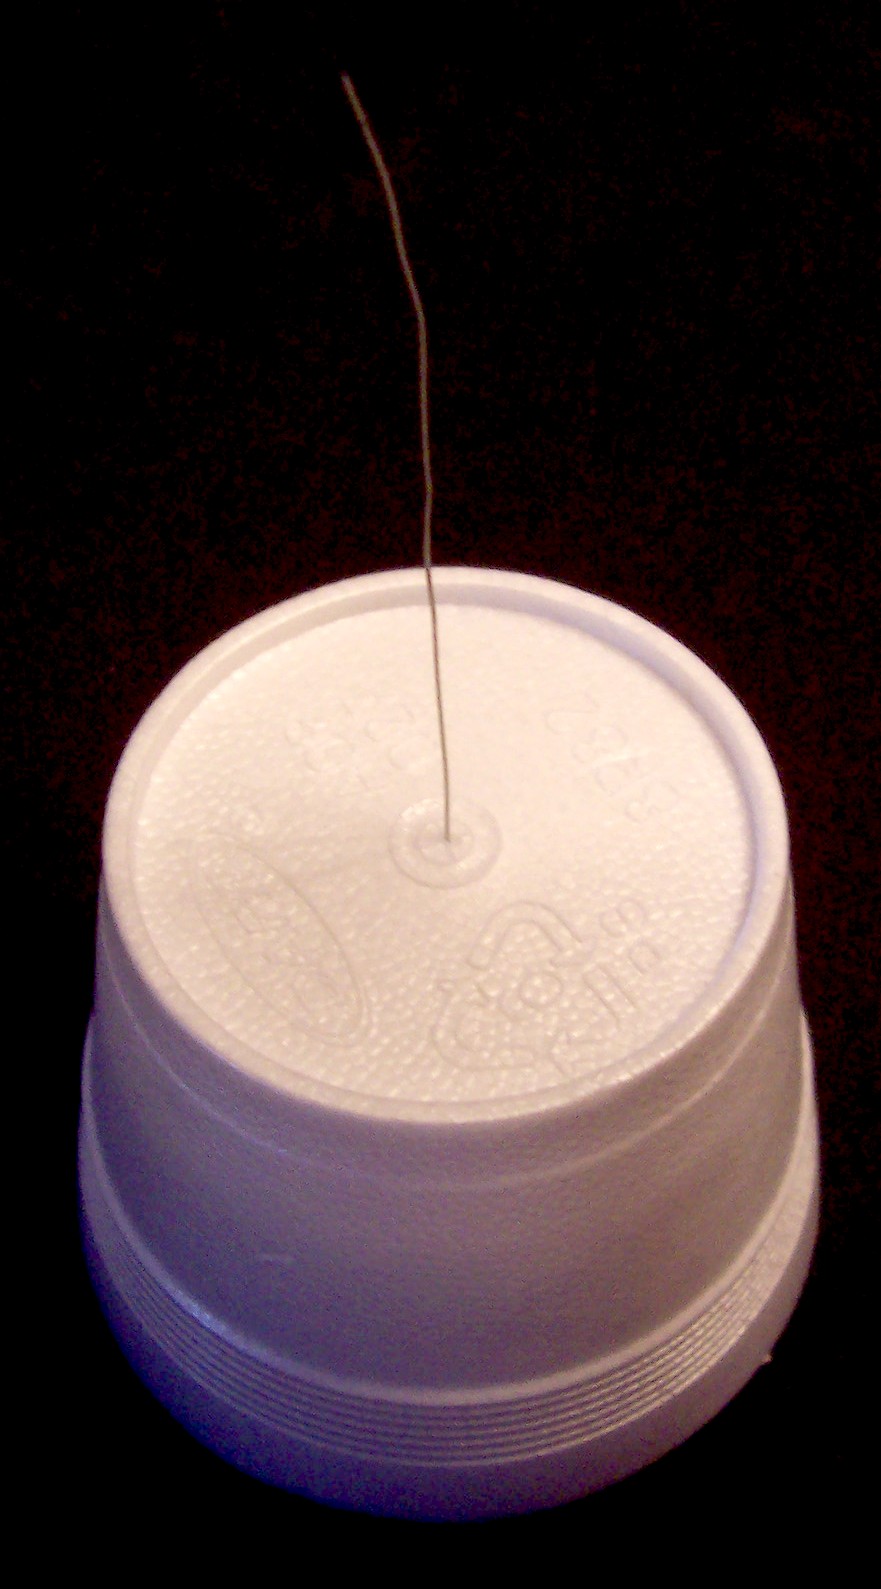
  2. Instead of a barrier with a slit, this version uses a vertical piece of wire to divide the light into "right" and "left." We cut the paper off of a twist tie and removed the wire without bending it. Then we made a stand for the wire by cutting around the top of a foam cup to make it shorter than the laser stand. We turned the cup upside down and poked the wire through the bottom so that it was standing straight up.
  3. We wrapped a rubber band around the laser's ON button so that it would stay on.
  4. The laser was put in its holder and placed on the seat of a chair. The foamcore projection screen was set up by leaning it against a chair about 6 feet away. We could see a small dot of laser light on the screen. (See directly above.)
  5. Then the wire in its holder was set up a few inches away from the laser. We moved it until it was in the path of the laser light. An interference pattern appeared! (Photo at top of post.)
  6. To make the labeler, we took the polarized glasses, and marked the lenses "right" and "left."  Then we cut them out, leaving the cardboard frame around everywhere but the inside edge (towards the nose piece). The two lenses were taped together so that the inside edges were just touching (no overlap or gap). Another twist-tie wire was taped along the join and trimmed.
  7. A holder was made by cutting off the top of another foam cup, then slicing a slot across the bottom. The labeler was set into the slot so that the wire was vertical in the center.
  8. The labeler was put in place of the plain wire. The light hitting the screen returned to blob form.
  9. Taking another pair of polarized lenses, we held up the "left" and "right" lens at a 45 degree angle between the labeler and the screen. At this point the light projected on the screen was hard to make out, but it did seem to spread out again like an interference pattern.
  10. Finally, we took a left and right lens, cut them on a diagonal, and taped them together so that one was on top and one on the bottom. According to the SciAm directions, we should have seen an interference pattern split so that the top was off to one side and the bottom to the other, like misaligned teeth. All we could see was misaligned blobs, though. (See below.)
As I said, if we try this again we will try moving some of the parts around to get better results. Just for the record, the glasses we used had lenses which were tilted at 45 degree angles, rather than the traditional horizontal and vertical. However, they were still perpendicular to each other, and we rotated each the proper amount from its starting point, so I don't think it mattered.

In my opinion, we achieved some interesting effects, for a living-room physics lab.
Reblog this post [with Zemanta]

Tuesday, February 16, 2010

Measuring Microwaves with Chocolate

I wrote up our latest lab as a post for GeekDad, and it ended up going popular on Digg! (For those who care.) To see how we measured the speed of microwaves with a chocolate bar, follow the link.

However, we did several trials, so here are some photos from our earlier attempts. And yes, the scale did go up in the last few days...
 
We only got only hot spot with this one ... and the paper plate started to burn (note lower right corner).


We tried multiple bars to get broader coverage. This worked a little better.

 
A dish full of chips provided the best coverage of all, but was too hard to pinpoint the hot spots. After several minutes of microwaving, we got one fused, hard point of chocolate (indicated by spoon) but not a second spot to measure. 

The results:
Best holder: glass baking dish
Best stand (to cover the rotating thing in the microwave): small plate
Best chocolate: Valentine's Day cherry cordials

This experiment has also been done with marshmallows and by kids on YouTube

Tuesday, February 9, 2010

Wave Lab Part 2


After watching some cool videos on YouTube, I decided it would be fun to make patterns with sound waves. These patterns are caused by the same kind of waves, and wave interference, that we saw with our pseudo-ripple tank experiment. Again, our setup was crude: we took a recycled container and set it over a tiny set of speakers and an mp3 player loaded with video game soundtracks. Then we sprinkled some salt on a plate and put it on top. We also tried sprinkling salt directly on the metal top, and then tried it with some water.

We didn't always get fancy patterns, but we did see some nice movement. Watch!


In the videos on YouTube done with real lab equipment, you can see cool Chladni patterns.


Here's an explanation from Teacher's Domain:

When an object vibrates at one of its natural frequencies (a rate of vibration at which it naturally tends to move), standing wave patterns are formed within the object. These patterns are the result of wave interference, which occurs at the meeting of two waves traveling within the same medium in different directions. The resulting disturbance within the material at the point where the waves meet is the net effect of the two waves. At certain points in the material, the waves cancel each other out through destructive interference and there is no net disturbance. These points are called nodes, or nodal points. Around the nodes, the waves constructively interfere; the points with the greatest disturbance are called antinodes, or anti-nodal points.
And here's an explanation of their origin and use from Robert Krampf:
These patterns are called Chladni patterns, named after Ernest Florens Friedrich Chladni of Saxony, who has been called the father of acoustics. He sprinkled sand onto metal plates and studied the way that they vibrated.

Besides being fun to play with, these patterns are useful. These patterns are used in designing musical instruments. If a part is attached to a place where the instrument vibrates, the sound will be dampened. By attaching parts at nodes, the instrument makes a full, rich sound. These patterns make the difference between an average instrument and a quality one.


Here are the rest of our videos:


Friday, February 5, 2010

Wave Lab Part 1


Having read the wonderful book How to Teach Physics to Your Dog by Union College professor Chad Orzel (post to come), which talks about the conundrums posed by lighting behaving as both wave and particle, I decided to do a series of labs dealing with waves and leading up to some demonstrations of wave/particle duality

We started out looking at the interference pattern created by splitting a laser beam (again, post and photos to come). But then I decided it would be helpful to go back and look at plain wave behavior. So I backtracked and did two simple demonstrations of waves -- one with water, one with sound.

For the water demonstration I made a very crude approximation of a "ripple tank." I took a shallow, dark colored plastic storage box, filled it with water, and created wave patterns with two spoons. We soon found that shining a light directly on the box made it easier to see the waves via the shadows they made. Although one source suggested tapping the water with the back of the spoons, we also found that we got better results by scooping up a little water and pouring back into the tank.


We observed how one wave moved away from the source (the drip) and then bounced back off the walls of the tank. Two simultaneous waves intersected and created a pattern with stronger crests and troughs (highs and lows) where they either added together or canceled each other out.

Here's a video of a real ripple tank courtesy of the Carleton University's YouTube Channel:


Stay tuned for Wave Lab Part 2: Sound Waves, coming soon!

Sunday, January 24, 2010

Kitchen Nanoscience


Nano is the scientific term meaning one-billionth (1/1,000,000,000). It comes from a Greek word meaning “dwarf.” A nanometer (nm) is one one-billionth of a meter. One inch equals 25.4 million nm. A sheet of paper is about 100,000 nm thick. A human hair measures roughly 50,000 to 100,000 nm across. Your fingernails grow one nanometer every second.


Nanoscale refers to things that are between 1 – 100 nanometers in size. A virus is about 70 nm long. A cell membrane is about 9 nm thick. Ten hydrogen atoms are about 1 nm. At the nanoscale, many common materials exhibit unusual properties, such as remarkably lower resistance to electricity, or faster chemical reactions. Nanoscience, nanotechnology and nanoengineering take advantage of these properties by working with individual molecules of material.

Not surprisingly, most Americans have a very poor grasp of nanoscience. In fact, according to NISE Net, the Nanoscale Informal Science Education Network,  many adults:
• Aren't sure whether atoms are composed of molecules or molecules are composed of atoms (they also confuse them with cells);
• Think everything microscopic is at the same scale
• Don't understand that matter is made up of particles, or believe there must be something in the space between particles;
•Believe that materials at the atomic or molecular level are simply shrunken versions of their real-world manifestations, with the same properties.

One of the ways NISE Net is working to change these misperceptions is by hosting events like NanoDays, which takes place in March. During NanoDays museums and schools around the country will hold demonstrations to explain nanoscience to kids and adults. Many of their past activities and educational materials are available at their website. Quite a few of these demonstrations are simple enough to do at home.


We did one very basic demonstration called Exploring Forces, which shows how the properties of materials differ according to scale using water and teeny-tiny containers. Although they weren't nanoscale, they did show -- as we saw in some of the documentaries we've been watching -- how the importance of forces like gravity change as quantities get smaller.

The experiment calls for doll-house teacups, but we used a Lego cup and goblet (natch!). After dipping the full-sized measuring cup into a bowl of water and pouring it out, we tried it with the Lego versions and found that it was harder to get the water to pour out. That's because the forces between the water molecules were stronger than gravity (this creates what is known as surface tension).

We also tried playing around with a variety of different sized measuring cups and spoons (including some very small "novelty" spoons, but only the very smallest (one "smidgen") exhibited surface tension, and only if you were very careful turning it over. However, I thought this was a fun and quick experiment to try.
Reblog this post [with Zemanta]

Tuesday, January 12, 2010

Velocity Lab, Or Why We Don't Do "Real" Labs


One of the most interesting things I noticed in the PBS series Einstein's Big Idea was how the early investigators looking into physical phenomena were able to make such precise measurements using such primitive equipment and facilities. If the re-enactments are to be believed, scientists like Antoine-Laurent Lavoisier and Emilie du Châtelet were basically conducting their research in a spare room at home. It must have taken a tremendous amount of patience to gather the data that proved, for example, the principle of conservation of matter or that the energy contained in a falling object was proportional to the square of its velocity.

In this experiment, we recreated Mme. Châtelet's demonstration by dropping marbles into cups of flour from various heights and measuring how far down into the flour they sank. Although I don't usually bother recording data -- no one is particularly interested in keeping track of what we're doing besides me -- in this case I thought we'd do it "the real way," like the classroom instructions call for. But right away we had to make changes. First, we could only find yard sticks, not meter sticks. So we cobbled together a meter stick by taping a tongue depressor onto our yard stick and marking off the extra centimeters.

(Note marble in mid-flight)

Next, the lab called for regular glass marbles, but we found that our results were rather random -- the marbles fell different depths without regard to what height they were dropped from. And sometimes they barely broke the surface of the flour. So we used some steel marbles we found, which tunneled into the flour an amount that could be measured.

Finally, the regular drink-sized paper cups called for in the lab were too shallow, and the (metal) marbles hit bottom and bounced back up. So I dug out some super-sized plastic cups that were about twice as tall as the original cups.


But in the end, our data was gibberish. We were simply too careless, and we didn't do enough trials to get a reliable answer. The whole experience reminded me of my traumatic days in high school science, where the top students (the ones who went onto med school, as it happens) routinely made up data to fit the expected results, so they'd get a good grade in the class.


(Stick marked in cm for measuring depth of marble)
In the three years since I began really focusing on science, I've been very proud of myself for getting nearly all the "labs" we do to work -- by which I mean they provide an impressive demonstration of the principle I'm hoping to illustrate. But I just think it's too much to ask for these demonstrations to provide useful data as well. We're not scientists, but we like watching cool things happen. I'm sorry to admit it, but it's true.


So if you're using this blog to find ideas for your own home or classroom science activities, take our example with a grain of salt. We're dilitantes with a capital "d," and we cannot be held responsible if your results vary.

Monday, January 4, 2010

Science and Math Collide to Find the Shape of Space


I've got a post up on GeekDad about computer games kids (and adults) can play to practice moving around in weird multi-dimensional spaces. Freelance geometer (geomatrician?) Jeff Weeks designed a 2-week-long middle-school curriculum called Exploring the Shape of Space. Several years ago I used it to put on a 1-day workshop for a group of elementary-school-age homeschoolers. I talked about the material (we had seen Weeks himself give a lecture at a local college), showed the video that came with the kit, and set up the different activities (making Moebius strips, playing tic-tac-toe on cylindrical boards, etc.) at stations around the meeting room so the kids could go around and try them all. Afterwards we gathered to talk about what they had found. It worked really well. The kit is still available from Amazon or the publisher, Key Press. Weeks has also written a high school level book on the subject.

Friday, December 18, 2009

Mass Lab: Conservation and Chemical Reactions


Not all the labs we did using the teacher resources from Einstein's Big Idea worked the way we hoped. One problem was my kitchen scale -- although it had lots of little numbers, it really wasn't sensitive enough to measure anything within the accuracy of its scale. (I'll post about the outcome of those labs another time.)


This lab, which comes from the Messing with Mass activity, also required a scale. So instead, I tried a technique from The Joy of Chemistry. We made up two identical bags of materials (see below) and hung them from a wire coat hanger set up as a balance. Then we mixed the contents of one bag while leaving the other untouched. The balance did not tip, theoretically showing that the mass remained the same even as the materials underwent a change of state from solid and liquid to gas. However -- like our insensitive scale -- it could just have been that the balance we set up wasn't very accurate. But basically the lab illustrated, if not demonstrated, what conservation of mass looks like. Here's what we did:


  • citric acid
  • baking soda
  • quart freezer bag
  • film canister, filled with water
  • wire coat hanger
  • rod for hanging
  • clips for hanging bag
  • measuring spoons
  1. Examine the two chemicals involved. (Ours came in packets left over from a root beer making kit. Although the original instructions warns students not to taste, if they're from your kitchen they're perfectly safe.)
  2. Measure out 1 teaspoon of citric acid into each bag. (We found the original 1/4 teaspoon too little to see much reaction.)
  3. Add 1 teaspoon of baking soda to the bags.
  4. Fill the film canisters with water and close the lids. Dry off the outside if needed and place 1 canister in each bag. Seal the bags tightly, squeezing out as much air as possible.
  5. Set up the rod so that the hanger can be hung from it. (We laid it across two tables.)
  6. Use the clips to attach the bags to the hanger as shown.
  7. Place the hanger on the rod, positioning the bags so that they are balanced. Use tape to hold them in place. (We didn't, and the bags did slide around.)
  8. Keeping the bag sealed, carefully open the film canister in one of the bags and pour the water out. You might want to leave the lid loose to make it easier to open.
  9. The chemicals and the water will react and produce a gas (carbon dioxide). The two bags should stay in balance.
Explanation:

Mass is the amount of matter an object contains -- as opposed to weight, which is a measurement of the force of gravity acting on it. As we saw in the documentary, Antoine-Laurent Lavoisier was the first to demonstrate that mass is conserved in a chemical reaction. Lavoisier made careful measurements of changes including water to steam in the late 1700s, aided by his wife, Marie Anne. Mass is always conserved in a chemical reaction in a closed system (except for an extremely small amount which is lost or gained in the form of light and/or heat energy).

We know a chemical reaction has taken place in the bag where the water was opened because the matter changed state, and because there was a temperature change. As the baking soda and citric acid combined, energy was absorbed producing an endothermic reaction. That means the bag got colder.

Thursday, December 17, 2009

Energy Labs: Battery-Powered Experiments


Continuing on with the description of the labs we did in conjunction with the PBS NOVA video Einstein's Big Idea, here are our adaptations of the directions for two activities using batteries:

Make An Electromagnet


  • insulated copper wire
  • rubber band
  • "D" battery
  • 2 large nails
  • small paper clips
  • wire stripper (or scissors)

  1. Cut a piece of wire about 40 cm long.
  2. Use a wire stripper (or scissors, carefully) to remove about 1 cm of insulation from the ends of the wire.
  3. Using the center of the wire, coil the wire around one nail, leaving about the same amount of wire on either side.
  4. Wrap the rubber band around the ends of the battery to hold the the wire in place.
  5. Connect the wires to the battery to create an electromagnet. Try to pick up paper clips and the other nail. Only keep the battery connected to the wires for 30 seconds.
  6. Touch the head of the nail after the circuit has been connected for 30 seconds to feel how the electrical current is making the metal heat up.
Explanation: The point of this station is that the magnetic field can do work. It can lift objects as the energy of the field is transferred to the paper clips. Since the strength of the nail's magnetic field is proportional to the number of coils of wire around the nail, we also experimented with different lengths of wire and numbers of coils.

Electrical to Heat Energy

  • batteries (we used pre-made "battery packs" with 4 AAs held together with tape and rubber bands and connected + to - with wires)
  • small lightbulb (we used one from an electrical set which came with wires)
  • compass
  1. Connect the lightbulb to the batteries using the wires. 
  2. Leave it lit for 15 seconds and feel the bulb heat up. 
  3. Using the compass, see if you can detect the magnetic field generated by the electrical energy traveling through the wire.
Explanation: The light bulb demonstrates how electrical energy can be converted to light and heat energy. Most of the light bulb's energy is given off as heat. The electrical energy is also the result of a transformation, from chemical energy (in the battery). As we saw in the documentary, Michael Faraday, a self-taught scientist in 19th century England, was the first to propose that the compass was being affected by invisible lines of force flowing around the wire.